

I can't believe this little lady is already four years old. I made her a sweet Cinderella dress up for her birthday this week, and I'm here to share it with you!
Here's what you'll need (to make a size 4T, adjust yours accordingly):
1 yard of satin-y fabric for main dress peice
3/4 yard of tulle or other special fabric for overskirt
30 inches of pretty ribbon, rick rack, silvery stuff for the place where the skirt and top meet
20 inches of 3/8 inch elastic
thread
I. CUTTING THE FABRIC
 First, take a dress your child already owns that fits her well. I liked the empire waist of this dress, but you could also do a long skirt and full top (like a t-shirt) if you were so inclined.
Fold your satin fabric in half and cut through both layers, following the outline of your dress. It's a good idea to make your cut 1/2 inch larger than the dress to allow for seams.
I cut the skirt first, then did the top separately because I wanted the empire waist look. So, trace the outside edges of your skirt, then fold the top (white peice) down so you can trace what will be the top of the skirt. You should have 2 separate skirt peices.
Then, fold the sleeves inside the top and trace the top. Cut that out too, and you'll have 2 separate top peices.
 For the sleeves, I held up a peice of tissue paper and traced the sleeve.
 Then, I folded my fabric and placed the tissue paper on top to trace it. The fold of the fabric should be where the shoulder/top of arm would be on the sleeve. Cut this out, then do it again. You'll end up with 2 sleeve peices, each looking a little bit like a C.
 Here's a picture of all my peices cut out. Once I had it all cut out, I decided I didn't think I'd make the neck opening big enough for her head, so I made it larger. As you look at your peices, you'll be able to think about that kind of thing.
 Now, for the over skirt. You just want one HUGE rectangle here, that is the same length as your skirt peice. So, measure the longest peice of your skirt and make a straight cut all the way across. We'll gather it up later to make it poofy.
II. SEWING THE MAIN PEICE
Take your 2 top peices and pin the shoulders together, right sides facing eachother. Sew those together. It will make a little O in the middle once you open it up.
 With the top peice opened up and the right side of the fabric facing down, pin your sleeves on. Start with the center part of the sleeve (where the shoulder of the top peice is), then work toward the underarm area. It's kind of curvy, so it doesn't pin perfectly. Just do a little at a time, then adjust it as you need to. It should look like this when you're done.
 Sew the sleeves on.
Then, keeping the right sides together, start at the outside edge of the sleeve (where the arm goes) and sew all the way down the body part of the top.

 Now would probably be a good time to zig zag all your stitches so the fabric doesn't fray. As you can see, it's a big fray-er. I also like to iron down all my seams after I zig zag. It makes it look so much better. Try it, and you'll agree with me!
Now we're going to make the casing for the elastic at the neckline. Fold the neckline down 1/4 inch and iron it, all the way across.
 Then, fold it over 1/4 inch again and iron it down once more. Pin this in place as you go. This is called double fold ironing and is helpful when you are creating a casing, as well as when you don't want the edges to show (like for a hem).
 Sew around the casing, leaving about an inch or so open so you can slide your elastic through later. (Note: you'll be using a safety pin to get your elastic through, so make sure you have a safety pin small enough for this. If not, make your casing larger.)
 See the spot I left open?
 On to the skirt. With right sides together, pin the two sides of the skirt together. Sew each side.
 Then, do the double fold iron method to create a hem for the skirt. Fold over 1/4 inch, iron, fold 1/4 inch, iron, and pin. Then sew your hem. Zig zag your stitches again on the sides of the skirt. Once again, iron those seams and you'll be impressed with how professional it looks!
III. GATHERING
If you haven't tried gathering, you need to. Especially if you have little girls who like things to be poofy. It is so simple and makes it look extra fancy.

 Then, pull a lot of thread (6 inches or so) out before you start sewing. This will help later.
 Now you have 2 lines of thread. Take the top of each thread (the part that did NOT come from the bobbin) and gently pull. As you pull these strings, the fabric will sort of bunch up. That's what you want it to do. If it gets stuck, gently pull it further along. You want to gather the whole fabric this way.
 See it bunching up?
 Once you've got it all gathered together, it should look like this, in a tight little circle.
 Then you want to pin it to your skirt peice. You want the right side of your overskirt on top of the right side of your satin skirt. As you pin, you'll have to open up your gathers a little bit to make it fit onto the skirt. That's okay, it's how you make sure it ends up the right size. Just try to keep the spacing even so that it doesn't end up totally gathered in one place and totally loose in another place.
 Once you have all of that pinned, you want to sew it together. IMPORTANT: Sew underneath your lowest row of gathers. Otherwise, you'll still see the the gather threads, and the gathers will likely come undone.
 IV. FINISHING
Now you've got 2 main peices: the top and the skirt/overskirt. Keeping right sides together, pin the top to the skirt. I feel like a good way to do this is to sort of tuck the top into skirt, making sure your seams line up.
 Sew all of this together, trying to stay on top of the line you sewed to join the overskirt and the skirt.
When you get it all sewn together, you'll have a lot of fabric on your sewn side. I just trimmed this off so that it would not bother my girl when she wore it. Then I zig zagged it, and ironed the seam.
 Zig zag baby!

To finish the sleeves, do the double fold iron method on them as well. I made my hem on my sleeves tiny, but you can do it however you'd like.
 To finish your neckline, pin a safety pin to the end of your elastic. Use the safety pin to help you guide your elastic through the casing you created.
 See how it comes out the other end and the neckline is now all bunched together? Cute!
 The final touch is to add your ribbon/embellishment. Simply pin it to the top of the dress, covering up the seam between the top and the skirt. Sew it on. I used a zig zag stitch for this embellishment thingie, but you might want to use a straight stitch if you're using regular ribbon.

 Now would probably be a good time to zig zag all your stitches so the fabric doesn't fray. As you can see, it's a big fray-er. I also like to iron down all my seams after I zig zag. It makes it look so much better. Try it, and you'll agree with me!
Now we're going to make the casing for the elastic at the neckline. Fold the neckline down 1/4 inch and iron it, all the way across.
 Then, fold it over 1/4 inch again and iron it down once more. Pin this in place as you go. This is called double fold ironing and is helpful when you are creating a casing, as well as when you don't want the edges to show (like for a hem).
 Sew around the casing, leaving about an inch or so open so you can slide your elastic through later. (Note: you'll be using a safety pin to get your elastic through, so make sure you have a safety pin small enough for this. If not, make your casing larger.)
 See the spot I left open?
 On to the skirt. With right sides together, pin the two sides of the skirt together. Sew each side.
 Then, do the double fold iron method to create a hem for the skirt. Fold over 1/4 inch, iron, fold 1/4 inch, iron, and pin. Then sew your hem. Zig zag your stitches again on the sides of the skirt. Once again, iron those seams and you'll be impressed with how professional it looks!
III. GATHERING
If you haven't tried gathering, you need to. Especially if you have little girls who like things to be poofy. It is so simple and makes it look extra fancy.
When you're going to gather something, you want your gathering fabric to be wider than whatever you're going to sew it to. In my case, my gathering fabric was 60 inches, the width of the bolt of fabric I purchased.
Before gathering anything, you'll want to fold your fabric in half, with right sides together. Pin and sew this, creating a tube. This is your skirt. Now would also be a good time to zig zag your seams and to hem the bottom with the double fold iron method.
My hem:
So, the first step in gathering, set your seam length on your machine to as large as it will go. In my case, that's a 4, but it might be different on your machine.
 Then, pull a lot of thread (6 inches or so) out before you start sewing. This will help later.
 Sew in a straight line, using the edge of the fabric as the guide. Leave a lot of thread at the end of your line here too.
Then, sew a second line as well, using your first line as a guide. Again, leave yourself lots of thread at both ends.
 Now you have 2 lines of thread. Take the top of each thread (the part that did NOT come from the bobbin) and gently pull. As you pull these strings, the fabric will sort of bunch up. That's what you want it to do. If it gets stuck, gently pull it further along. You want to gather the whole fabric this way.
 See it bunching up?
 Once you've got it all gathered together, it should look like this, in a tight little circle.Then you want to pin it to your skirt peice. You want the right side of your overskirt on top of the right side of your satin skirt. As you pin, you'll have to open up your gathers a little bit to make it fit onto the skirt. That's okay, it's how you make sure it ends up the right size. Just try to keep the spacing even so that it doesn't end up totally gathered in one place and totally loose in another place.
 Once you have all of that pinned, you want to sew it together. IMPORTANT: Sew underneath your lowest row of gathers. Otherwise, you'll still see the the gather threads, and the gathers will likely come undone.
 IV. FINISHING
Now you've got 2 main peices: the top and the skirt/overskirt. Keeping right sides together, pin the top to the skirt. I feel like a good way to do this is to sort of tuck the top into skirt, making sure your seams line up.
Sew all of this together, trying to stay on top of the line you sewed to join the overskirt and the skirt.When you get it all sewn together, you'll have a lot of fabric on your sewn side. I just trimmed this off so that it would not bother my girl when she wore it. Then I zig zagged it, and ironed the seam.
Zig zag baby!To finish the sleeves, do the double fold iron method on them as well. I made my hem on my sleeves tiny, but you can do it however you'd like.
 To finish your neckline, pin a safety pin to the end of your elastic. Use the safety pin to help you guide your elastic through the casing you created.
 See how it comes out the other end and the neckline is now all bunched together? Cute!
Pin the two ends of your elastic together, overlapping them at least 1/2 inch. Then sew that, using all means in your power to make it strong. I usually try to make a rectangle on top of the elastic, but with elastic this thin, it's kind of tricky. I just sewed a few straight lines next to eachother.
Then, close up the casing by sewing it as well. Your elastic is in place!
 The final touch is to add your ribbon/embellishment. Simply pin it to the top of the dress, covering up the seam between the top and the skirt. Sew it on. I used a zig zag stitch for this embellishment thingie, but you might want to use a straight stitch if you're using regular ribbon.
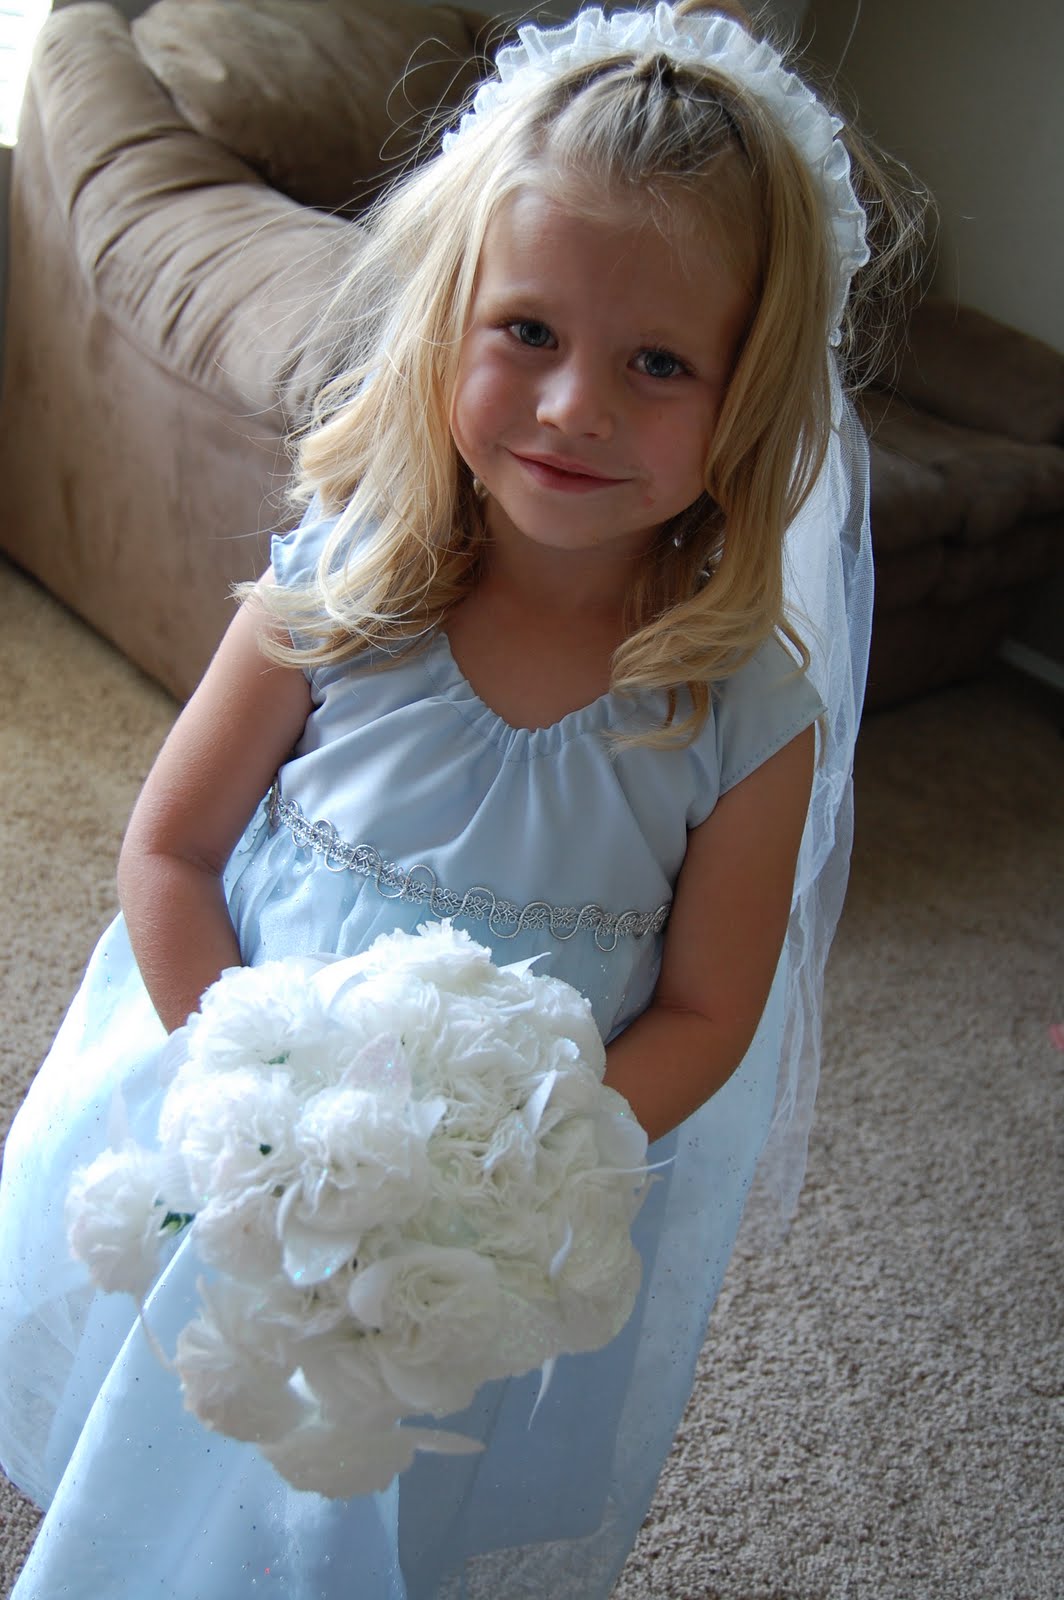
Voila! A dress fit for a queen. Or a princess, as the case may be.


Isn't it just amazing how this great tutorial of yours connected us!Looking forward to see more of your great work in the future.I made Cinderella dress for my daughter , she likes it so much that we have to wear it EVERY day!All the best , Dzejna
ReplyDelete